
About Me
Monday, December 7, 2009
Game Descriptions-Level 3
Level 3- This level is the second last level. In this level the player needs to try and touch the ripe, red apple but they have to dodge the two rotten apples. This is also done with the use of the arrow keys to guide it around. This level was one of the hardest to make.
Friday, December 4, 2009
Game Descriptions-Level 2!!!
Level 2- The aim of this level is to touch the pear and dodge the rotten pear. This is done by guiding the panda using the arrow keys. This level was harder to make because I had to have three different sprites all moving around the screen. I had to use broadcast for this level as well. Broadcasting helped to switch from level 2 to level3.
Thursday, December 3, 2009
Game Descriptions-Level 1

Level 1- The aim of level 1 is to collect the bambo shoot using the arrow keys. This level is the easiest to complete and also the easiest to make since there are only 2 sprites and not too many scripts. To make this level I had to use Broadcast which is something new that I learnt to do. This was helpful when I needed to change levels.
Monday, November 16, 2009
Starting the Assignment!!!

This is a screenshot of what I am going to do for my assignment. This screenshot shows the first level of the game. The aim of the game is for each of the different pandas on each of the different levels to reach the bamboo plants. There will be about 4 or 5 different levels depending on the time. Each level will be at a different location with a different panda. The
Tuesday, November 10, 2009
Scratch Challenge 4

This is the Fourth Scratch Challenge. This challenge is similar to the third challenge but in this one I had to make the bat look as if it was coming closer to the viewer by increasing the size. This is done by using the Looks Section.
Scratch Challenge 3

This is the third Scratch Challenge. In this challenge I had to try and make the bat look like it is moving. I did this by using two images and having them switch every one second and move ten steps. I used the Control Section to tell it when to start and for how long. I also used the Looks and Motion Section to tell it to switch images and how far to move.
Monday, November 9, 2009
Scratch Tutorials!!! Say Something

This tutorial is called Say Something. It has taught me how to make it seem like the pictures are speaking by using speach bubbles. I used the Control section to tell it when to start. I also used the Looks section to tell it what to say.
Scratch Tutorials!!! Moving Animation

This is the tutorial called Moving Animation. This tutorial taught me how to make it look as if the picture is moving by using different pictures. I used the Control section to tell it when to start moving and for how long. I also used the Looks and Motion section which tells it when to change pictures and what to do when it hits a wall.
Friday, November 6, 2009
Scratch Tutorials!!! Move to a Beat

This tutorial is called Move to a Beat. This helps me to make the picture move according to the drum beat. It is made up of buttons from the Control section which tells the picture when to move and for how long, the Motion section which tells it how far to move, the Looks section which tells it when to change pictures and the Sound section tells when to play the drum beat.
Scratch Tutorials!!! Key Moves

This is the scratch tutorial called Key Moves. This tutorial taught me how to control the picture to move up, down, left, right according to which arrow keys are pressed. It consists of buttons from the Control Section which show how to control the image and the Motion Section which tells it how far to move and in which direction.
Tuesday, November 3, 2009
Scratch Tutorials!!! Glide

This is the tutorial called Glide. In this tutorial the dragon glides wherever you tell it to. I had to use the Control section. This is what tells the picture when to move. I used the Motion Section which tells the picture where and how far to glide.
Monday, November 2, 2009
Scratch Tutorials!!! Follow The Mouse

This is the Tutorial called Follow the Mouse. In this tutorial I learnt how to make the 2 pictures follow the mouse cursor across the screen. To do this I had to choose 2 animal pics that I wanted and I had to use the Control Section. This was where I chose when it would start and for how long. I also needed effects from the Motion Section. This helped me to choose where the pics were going to go and how far they would move each time. I also chose a background for them to move around in.
Scratch Tutorials!!! Dance Twist

This is the tutorial called Dance-Twist. In this tutorial I learnt how to make the little girl in the picture whirl. I had to choose an image which I wanted to use. I then had to go to the control section to select a few buttons which control when it starts to move. I also had to use buttons from the Sound section. This allowed me to chose the background music that I wanted while the little girl was moving. I also needed the Looks section which let me choose the effects that I wanted to happen. Also I decided to use a background fo the girl to stand in.
Scratch Tutorials!!! Change Colour

This is the tutorial called Change Colour. With this tutorial I learnt how to make the butterfly change its colour just by pressing the space bar. I followed the tutorial. All I had to do was choose a pic that I wanted the colour to be changed and I went to the Control Section from which I chose the button which controls when to change colours. I also went to the Looks section and I chose the effect which lets it change colours. The last step was just to click the space bar to change the colours. I also picked a background for it.
Tuesday, October 27, 2009
Scratch Tutorials!!! Animate It

This is the tutorial called Animate It. I tried this out and created a shark that is moving and swimming in the water. To do this I had to first open up Scratch. I had to pick different pics to make it look like its moving. Then I had to pick the buttons from the Control section. These show the time limit, when to start my animation and how long it would be to wait. I then had to go to the Looks section. This shows which costume (picture) to move to. I then picked out my backgrounds. I chose to import a background of the ocean for my animation. This also needed to be assissted with the Control and looks section. I also chose a water sound in the background. This is put in order when I went to the Sound section and chose when and how long to play the sound.
Tuesday, October 20, 2009
FlowChart Egs

Today I am making flowcharts. Here are some egs of the ones I made. Click the image to enlarge it.
Monday, October 19, 2009
Computers never do what you want them to do, they only do what you tell them to!
Defintions:
 Algorithms- They are step by step procedure for problem solving. Computer codes are often algorithms.
Pseudocode- This is a high level code. It is usually used to show a rough idea of the general steps in an algorithm without needing to write the actual code.
Machine Language- This is also know as Machine Code. It is a set of coded instructions that the computer can use without any translation.
High Level Computer Language- Computer Language is an arrangement of instructions used to develop softwares for computers. This is the language for computers and they understand what they need to do.
Flowchart- It is a repr esentation using symbols to show a sequence of activities.
The symbols used for:
Begining and ending a set of instructions

 Algorithms- They are step by step procedure for problem solving. Computer codes are often algorithms.
 Pseudocode- This is a high level code. It is usually used to show a rough idea of the general steps in an algorithm without needing to write the actual code.
Machine Language- This is also know as Machine Code. It is a set of coded instructions that the computer can use without any translation.
High Level Computer Language- Computer Language is an arrangement of instructions used to develop softwares for computers. This is the language for computers and they understand what they need to do.
Flowchart- It is a repr
 esentation using symbols to show a sequence of activities.
 The symbols used for:
Begining and ending a set of instructions

Decision Making

A process or action

Monday, September 28, 2009
28th September 2009
Today I am fixing up my posts and assignments a little.
Some useful sites that I have found and used:
Piracy and Copyright
-http://www.theallineed.com/computers/07102280.htm
-http://www.library.ualberta.ca/guides/plagiarism/terminology/index.cfm
-http://www.indianmi.org/whatispiracy.htm
Secondary Storage
- http://www.slideshare.net/py7rjs/secondary-storage-presentation
- http://www.scribd.com/doc/3629734/Chapter-8Secondary-Storage
-http://joung.im.ntu.edu.tw/teaching/bcc/2000/ch05_l.pdf
-http://searchstorage.techtarget.com/sDefinition/0,,sid5_gci552456,00.html#
Digital Radio
-http://www.digitalradioplus.com.au/
-http://www.digitalradiodr.com/whatadvantages.htm
BlueTooth
-http://www.theallineed.com/computers/07102280.htm
-http://www.blue-tooth-wireless.com/Advantages_And_Disadvantages_Of_Bluetooth.html
-http://ezinearticles.com/?What-Are-The-Advantages-Of-Bluetooth-Technology?&id=562666
Tuesday, September 22, 2009


Secondary Storage - secondary storage title page
 Secondary Storage - secondary storage title page: ""

Friday, September 11, 2009
11th September 2009
Today we worked on our assignment. I started my second topic which is Secondary Storage. I am starting this even though I haven't finished my first topic so that I have an idea what my second topic is all about.
Tuesday, September 8, 2009
8th September 2009

Today I found a good video on google video but there is a problem. I can't seem to upload it to NotaLand. I am still trying to see if there is any other way to upload videos onto NotaLand
Monday, September 7, 2009
7th September 2009
Today in IST I worked on the assignment which is supposed to be due next week. I am continuing researching on the topics that I have chosen.
Friday, August 28, 2009
25th August 2009
Today we worked on our assignment. I continued researching Digital Radio and Debie continued researching Hand Held Media Devices. I tried to upload a video to my page but I couldn't. This is one of the disadvantages of using NotaLand.
Monday, August 17, 2009

Friday, August 14, 2009
14th August 2009
Today we are actually going to start our assignment on NotaLand [to see our page click the link in the previous post] . We made the title page. We are going to start with the information next lesson because thats when Mr Lennon is going to give use the criteria. We have also started researchin our topics today.
Tuesday, August 11, 2009
11th August 2009
Today we are going to create a new NotaLand page and use it for our assignment. We have also chosen our topics.
 Debie will be researching:
-Handheld Media Devices
-Social Networking
-Sound Cards
-Cloud Computing
I will be researching:
-Digital Radio
-Secondary Storage-Blu-ray disks & Flash Drives
-Piracy and Copyright
-Blue Tooth
 Debie will be researching:
 -Handheld Media Devices
-Social Networking
-Sound Cards
-Cloud Computing
I will be researching:
-Digital Radio
-Secondary Storage-Blu-ray disks & Flash Drives
-Piracy and Copyright
-Blue Tooth
Monday, August 10, 2009
10th August 2009
Today we are looking at Notaland. We have decided that we are using this site for our assignment because it is easy to use and you don't have to pay for anything.
Notalan d:
d:
Notaland allows us to import pictures, music, etc. This site is very easy to use. and people can view our work. It is also quite easy to find the work because there is an index. This site also allows me and my partner to work on it at the same time. We can also view each others work.
Notalan
 d:
d:Notaland allows us to import pictures, music, etc. This site is very easy to use. and people can view our work. It is also quite easy to find the work because there is an index. This site also allows me and my partner to work on it at the same time. We can also view each others work.
Tuesday, August 4, 2009
4th August 2009
Today me and Debie are playing around and figure out how to use ScrapBlog. We created a practice account to see how we could use it to present our work. We also want to try and find another site we might be able to use.
ScrapBlog: This site allows us to type up texts and import pictures and videos. It is very easy to use although sometimes the images and stickers require you to pay. It is very easy to add pictures and themes because all you have to do is drag it. There is one problem though. There is no menu so it would be hard to look for specific information. Me and Debie can both work on this at the same time. I can also view what Debie has done.
Monday, August 3, 2009
3rd August 2009
Today we looked at some more sites and we found out that we can both go on Protopage at the same time but to see each others work we have to get out of that page and back again. We decided to check out ScrapBlog and .
Protopage Continued...
The purpose o f the tabs are so you can add information, pictures etc for other people to see. We made our own tabs on our draft Protopage.
This site allows us to import images, videos, pics and etc. It is very easy to use and it is easy for other people to view it. It is also very easy for me and my partner to work on our assignment and we can both work on it at the same time.
Protopage Continued...
The purpose o
This site allows us to import images, videos, pics and etc. It is very easy to use and it is easy for other people to view it. It is also very easy for me and my partner to work on our assignment and we can both work on it at the same time.
Friday, July 31, 2009
Assignment- Investigating Tools
Today we are looking for tools that we would like to use. They are PageFlakes, ProtoPage, WikiSpaces, SproutBuilder and Go2web20. So far PageFlakes isn't letting us go onto the site so I only did the others. Here they are:
ProtoPage:
We went onto ProtoPage and made a practise account [it is linked in the title]. We also found out information about the site. A widget is an application that can contain clocks, games, words etc
ProtoPage:
We went onto ProtoPage and made a practise account [it is linked in the title]. We also found out information about the site. A widget is an application that can contain clocks, games, words etc
31st July 2009
Today we chose the rest of the topics we are going to research. The ones we chose last lesson are:
- Handheld multimedia devices
- Privacy and Copyright
- Digital TV Transmission, HD TV Transmition
- Secondary storage.
Today we chose:
- Sound Cards
-
-
-
- Handheld multimedia devices
- Privacy and Copyright
- Digital TV Transmission, HD TV Transmition
- Secondary storage.
Today we chose:
- Sound Cards
-
-
-
Tuesday, July 28, 2009
Assessment- Researching Multimedia Presentation Tools
27th July 2009
I am starting our assessment today. Our group consists of me, Diana and Debie. Today we just got a look at the assessment and got together our groups. We read through the assessment sheet. It is due on the last week of the term. We also chose our topics that we would present. They are:
- Hand held multimedia devices
- Privacy and Copyright
- Digital TV Transmition, HD TV Transmissions
- Secondary Storage
Assignment film synopsis

I just remembered that I forgot to add a film synopsis so here it is:
Little Red To The Rescue Synopsis
Our movie is based on the fairytale Little Red Riding Hood. We changed it and made it more modern. In our film Little Red (Diana) has a friend named Arveen. Arveen isn't the smartest person especially when she decides to trust an old lady who is a stranger to her. Arveen is taken hostage because she was supposedly helping out the old lady. The moral is Don't Trust Strangers. Our goal was to teach the audience the moral of Little Red Riding Hood which is Don't Talk To Strangers as well as our moral which is Don't Trust Strangers.
Monday, July 27, 2009
The World Of Multimedia!!!
Multimedia is all around us. New multimedia devices are being made every single day!
The mo st commonly used multimedia in my daily life is when:
- I use the computer at hom,e & at school
- I listen to music at home and whenever I go out
- I watch TV at home
- I go on the Internet at home and at school
- I use my Mobile Phone at home and any time I go out
The m ultimedia device that would be the hardest to be without is:
My computer. This is because it has everything on it. It has my music, homework, photos, pics etc.
The mo
 st commonly used multimedia in my daily life is when:
- I use the computer at hom,e & at school
- I listen to music at home and whenever I go out
- I watch TV at home
- I go on the Internet at home and at school
- I use my Mobile Phone at home and any time I go out
The m
 ultimedia device that would be the hardest to be without is:
My computer. This is because it has everything on it. It has my music, homework, photos, pics etc.
I think that the video on future directions will come true.
There are however advantages and disadvantages.
The advantages are
-its very easy to use
- Its convinient
- Everything is linked by computer
- It doesn't disturb anyone (loud music)
The disadvantages are:
- It would be very expensive
- It might not work like you planned
- It night be hard to use because its new
Tuesday, July 7, 2009
Tuesday 7th July 2009

Today we finished uploading our video and are continuing to edit the assignment. Our whole group came to skool today so we all helped edit the movie. We are only doing Part I to our film and we are going to hand that up. Our production will be called Little Red To The Rescue Part I.
Monday, July 6, 2009
Little Red Story Board
Check out this SlideShare Presentation: Today Julia was away so we can't film the finishing touches to our film. Me and Debie edited our film so far. It is really hard to find a good sound track for the film. I also uploaded the story board to my blog. I used the website http://www.slideshare.net/ to help me upload the story board.
Friday, July 3, 2009

Tuesday, June 30, 2009
Tuesday 30th June 2009
Today Mr Lennon was away again and we got an extension on our assignment. We looked up some sounds for our sound track from h ttp://www.findsounds.com/ISAPI/search.dll. We found really usefull sounds but it didn't have any mysterious sounds. Also we filmed the infringement scene this morning.
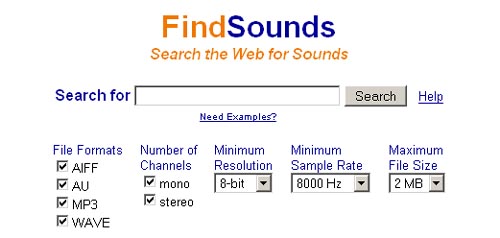 ttp://www.findsounds.com/ISAPI/search.dll. We found really usefull sounds but it didn't have any mysterious sounds. Also we filmed the infringement scene this morning.
 Data Compression
What is Data Compression???
Data Compression is the process of converting data or information into code using less bits than one that hasn't been converted would use through the use of specific encoding schemes.
What is data compression ratio???
The data compression ratio is also known as compression power. It is a computer term used to determine the reduction of the data represenation size.
Why is data compression an important technique for the online world?
Well data compression is important for the online world because it saves a lot of space.
Monday, June 29, 2009
RSS Feeders and Readers
Definition of RSS Feeders:
An RSS is the format that is used for distributing news and other information put on a website.
What goes in the feed???
The things that go in the feed are text, audio, images, logos and video.
What can a feed do for you???
Well a feed keeps your audience up to date. It allows other people to see your info without having to go directly to your website. It saves a lot of time and frustration.
How are feeds different from emails???
Feeds are different from emails because emails are a delivery method that is often filled with spam, resulting in people no wanting to give away their email addresses. Feeds on the other hand are secure delivery methods. The comments are annonymous and there is no spam.
How do people read feeds???
People read feeds by using a news reader or content aggregator.
How do you find feeds you want to subscribe to???
Usually the feed will have a key word search and the people reading won't realise they are reading feed content
Monday 29th June 2009

Today Mr Lennon was away so we can't use the skool cameras to upload our video assignment. We have already filmed more than half our film and uploaded the first few scenes. We just have to do about 2 more scenes and upload them. We also need to narrate over our film and add a sound track. We also finished the story board today.
Monday, June 22, 2009
Monday 22nd June 2009

Today we tried uploading what we have filmed so far. My camera couldn't upload the videos so we used the skool cameras. We had to make all the files mpg files for them to be able to upload into Zune Convertor. We are also going to film the park scene again. Next lesson we will experiment with movie maker.
Tuesday, June 9, 2009
Assignment

Tuesday 9th June 2009
Today we discussed what we are going to do in our assignment. We decided to base it on Fairytales but we would twist it around a little. We are going to use the story Little Red Riding Hood and base it on our school life. We wrote up a list of what we need and the characters involved in it.
The characters are Little Red Riding Hood, Teacher, Stranger, Policemen and Little Red's Friend. The places in it are Park, Classroom, Outside of school and in school. The props needed are a red cloak, art supplies, handcuffs, toy guns and a black cloak.
Monday 15th June 2009

Today we are continuing with our assignment. We started drawing up our story board. We decided to work on this at lunch so we booked a seminar room. We also continued with our script.
The cast of our play includes:
Little Red-Diana Lam
Mum-Julia Yang
Stranger-Debie Khazen
Police1- Julia Yang
Police2-debie Khazen
Friends group/Xtras-Arveen Kaur, Arianne Adlao, Sadie Arida, Princess Chalhoub, others
Tuesday 16th June 2009
 Today we worked on our storyboard. We brought in some of the props and will start filming tomorow morning. We also continued working on our script. We plan to shoot the morning scene where Little Red walks out of the train and walks to school tomorow.
 Wednesday 17th June 2009
Today we came to skool early to work on our asssignment. We started shooting the morning scene where little red exits the train and walks to skool with her friends. These shots didn't turn out very well so we are just going to keep them as back ups or bloopers.
 we came to skool early to work on our asssignment. We started shooting the morning scene where little red exits the train and walks to skool with her friends. These shots didn't turn out very well so we are just going to keep them as back ups or bloopers.
Thursday 18th June 2009
Today we s hot the park scene. We each told our xtras to bring in mufti clothes fot the scene. We filmed this at lunch. Some of it turned out pretty well but we are going to re shoot a better one on Monday because some of our extras are away on a History Elective excursion.
Friday 19th June 2009
Today we worked on the story board and the script. We also came early to shoot the morning scene again because the first one wan't that good.We also studied the parts we already filmed.
Monday, June 1, 2009
My Video
This is my video about really cute puppies. I made it by importing a whole lot of pics into Windows Moviemaker. I made a title for my video. I also added video transitions and video effects. I made the colours change by using Video Effects. I made the pics change from one to another by using video transitions.
Friday, May 22, 2009
My ringtone
This is my ringtone. I used the song Decode by Paramore. I edited it on Audacity to speed up the tempo and to make the sound fade out. It took me a while cause I kept forgetting my earphones but I finally remembered so thats why I have finally finished the ringtone and it is on my blog.
Monday, May 18, 2009
New Vocab Words
Here are a few new vocab words from IST that we have to know
Stereo - Stereo is when feeding 2 or more seperate microphones to 2 or more loudspeakers through different channels.
Track- A musical composition that have vocal parts that are sung usually accompanied by musical instruments.
Channel- A channel is a seperate path in which signals can flow. This is used in Telecommunications in general.
Frequency- It describes the number of waves that are passed through a fixed place in any given amount of time.
Hertz- It is a unit of frequency of one cycle per second. It replaces the term cycle per second.
Decibel- Decibel is used to measure the sound level. It is also widely used in electronics, signals and communication.
Wav- A WAV file is a standard audio format for storing music, sound bits and other items onto your computer.
Mp3- This is a standard format for compressing a sound sequence into a very small file. It does this while still keeping the original level of sound quality.
AIFF- It stands for Audio Interchange File Format. It is used to store and transmit high quailty audio data like music.
Monday, May 4, 2009
Introduction to Video Notes!!!
Q1] The video format we will be using this term is Digital Video, what is the other, older format that was used recently?
The older format that was recently used is Analog Video
Q2] Describe the difference between the two formats.
The difference between Digital and Analog Video is:
The older format that was recently used is Analog Video
Q2] Describe the difference between the two formats.
The difference between Digital and Analog Video is:
Analog signals are made up of constantly changing waveforms. The value of the signal at any time can be any where in between the range of the allowed max.and min. Digital on the other hand are only transmitted at precise points chosen at intervals on the curve. The max. value represents 0 and the min. value represents 1.
Q3] What are some of the advantages of Digital Video? The advantages of Digital Video are:
-There is a very accurate transmission compared to analog. There is no way for an analog signal at the receiveing end to distinguish between the original signal and any noise that may have been made during the transmission.
-With Digital Signals, it is alot easier to find the original info from the noise. With Analog each repeated transmission there is more noise collected. As a result there is poor accuracy that can attribute to a general loss.
-It is also a lot easier to duplicate or copy info. The more info you copy the more noise occurs on top of it if you use Analog Signals. If you use Digital Signals there is less noise.
Q4] What is meant by frame rate?
Frame rate is the number of pictures shown per second on a film or a video. For us to see a smooth motion, there has to be a frame rate of 10 frames per second.
Q5] Do all applications use the same frame rate?
No not all applications have the same frame rate. The movies we see played in the cinema are filmed and projected at a frame rate of 24 frames per second. The movies that are ahown on T.V are projected at a frame rate of about 30 frames per second.
Q6] What is meant by Resolution, how is it measured?
The resolution of the image is the amount of info in each frame. The resolution is normally represented by the number of individual pixels that are on the screen, and is expressed as a number of vertical pixels times by the number of horizontal pixels.
Q7] What is the colour system called RGB?
The RGB colour system stands for the Red, Green and Blue components of a colour. The computer displays the colour system RGB. Each and every pixel we see is actually light coming from a red, green and blue phosphor put very close together. Once they are close together, our eyes blend the primary light colours so that we see a coloured dot.
Q8] Explain the video standards PAL, NTSC and SECAM, what are the main differences between?
We use 3 television standards in the world. They are PAL, NTSC and SECAM. We don't have to worry about these standards because the cameras, T.Vs and video peripherals that you buy in the country that you live in will conform to the standards of that country.
The NTSC format is used in USA, Canada, Japan, Korea and Mexico. There are 525 horizontal lines and the frame rate is 29.97 frames per second.
The PAL format is used in Australia, China, Most of Europe and South America. There are 625 horizontal lines and the frame rate is 25 frames per second.
The SECAM format is used in France, Middle East and Most of Africa. There are 625 horizontal lines and the frame rate is 25 frames per second.
Q9] Which Standard do we use in Australia?
In Australia we use the PAL standard.
Q10] For what type of video camera would you need to have a Video Capture Card in your computer to download video?
The type of video camera that needs a Video Capture Card in your computer to download video is the traditional analog camcorders.
Q11] Why don't we need a video capture card for the video we will be doing at school?
We don't need a video capture card for the video we will be doing at school because we don't use analog camcorders but digital cameras.
Q12] What is IEEE 1394 port?
This is a port in which you connect an IEEE 1394 connector to a digital video camera to a computer's IEEE 1394 port.
Q13] Why do digital Video cameras use video compression?
Digital video cameras use video compression because there are large amounts of data in an umcompressed video.
Q14] Describe what codec is.
Codec is what decompresses videos and compresses them.
Q15] What is meant by generation loss, where does it happen?
Generation loss is when you duplicate something but it is not as good as the original . It happens with both digital and analog video types but more often with Analog.
Tuesday, April 7, 2009
Image File Types
This is the next IST task. I am so behind on my work. I am only up to task 9.0. In this task I have to describe GIF files, JPEG files, Animated GIF files, MPEG files, and Shockwave files.
GIF Files
So a GIF file is great for storing drawings that have alot of the same colour pixels. This is because in a GIF file, all the number of colours are reduced to 256. It then runs the same colour pixels encoded in a colour and the number of pixels in a format. For example: If there are 100 pixels on a picture with the colour of 41 , the image file keeps the colour of 41 and the length of 100.
That's all for GIF files now on to JPEG files
JPEG Files
A JPEG file does not create a perfect copy of the original image like a GIF file although it uses a much more complex technique to compress pictures. It can compress photos where each pixel colour is different. Now onto Animated GIF files.
Animated GIF Files
An animated GIF is a series of GIF files joined together and shown one after another. If there are enough frames the animation could look realistic. The size of the file is the sum of the GIF files used to create the series.

Monday, April 6, 2009
animation task

This task was not that hard now that I have done my assignment. It was alot easier to do than the assignment. All I did to create this was I drew a yellow circle on Gimp and I added the petals each time I added a layer. Uploading it to my blog was a bit hard because I had to make a Photobucket account and upload it onto there. Then after I finished I uploaded it to my Blog. This took about two lessons.
Friday, April 3, 2009

Wednesday, April 1, 2009
Assignment Journal!!!
Monday 9th March
Today I started to figure out how to use Inkscape and Gimp. Let me just tell you, its not as easy as it looks. It took me several tries to figure out how to use it. At first I couldn't animate the pictures that I wanted to because they weren't svg files. [ I had to ask Mr Lennon for help]. I decided to have a dove and a sun on the Caritas banner.
Tuesday 10th March
Today I changed my mind about my animation because I thought the dove was too hard to animate and I couldn't trace the dove properly, it ended up really ugly. I am going to use the motto "In Deed Not Word". I decided on using Inkscape. I never knew that Gimp was so hard to use. I couldn't figure out how to make my pictures move. It got very frustrating. I chose Inkscape because I found it easier to make the pictures move and also easier to edit the images.
Friday 13th March
Today I tried on deciding on what to put onto my animation. I am going to have a banner with a sun in sunglasses and clouds drifting away. I am also going to make the sun speak with a speech bubble.
Tuesday 17th March
Today I started to make the first frame of my animation. I then realised that I didn't know how to export the still frame from Inkscape. I had to ask Mr Lennon for help (again). He taught me how to do it and I got the first 10 frames done and saved to my USB. The frames were saved as PNG images.
Monday23rd March
Today I continued making my animation. At this rate I was aiming for maybe 100 frames and about 10seconds. This would mean I would have alot of work to do.
Friday 27th March
Today I am half way through finishing my animation. I changed my mind again and I decided that I am going to add shoes walking in. Inkscape is starting to get easier, now that I finally know how to use it.
Monday 30th March
Yay! Today I nearly finished my frames! I can't wait till I finish. I want to see my animation move automatically. I thought that this assignment wasn't THAT hard once I knew how to work the programs.
Tuesday 31st March
I'm so happy today. I finished my frames for my animation! Now there's only one problem. I don't know how to upload my frames onto Gimp! I also don't know how to upload the finished product onto my Blog! I asked a friend to help me and she showed me how to do it but it was about to finish and my computer froze and the bell rang. So now I'm left to do it on my own.
1st April-April Fools Day!
I finished ny assignment! Not really, April Fools. Any way, today I went to the library at lunch to do the assignment. I found the tutirial on StudentNet on how to upload my frames into Gimp but there was a problem when I started to do it. It played backwards for some reason. Plus the bell rang so I just deleted it.
2nd April
Today I tried to upload my frames to Gimp again at lunch but it still played backwards and my computer froze again. It got very frustrating. I still don't know how to upload the finished product onto my Blog and the assignment is due tomorow!!!=0

Monday, March 9, 2009
3D Shapes and Shadowing

This is the 3D task. I used Microsoft Word to create these 3D shapes and the shadows. All I did was use the autoshapes in Word to make the original images. Then I just clicked the shadow button for the Lightning Bolt and the 3D button for the Circles.
Friday, February 27, 2009
Eight Of Clubs!!!

The eight of clubs was saved twice. One as a 24-bitmap and the other as a Monochrome bitmap.
The difference between a 24-bitmap and a Monochrome bitmap is the file size. The 24-bitmap file size is alot larger than the Monochrome bitmap file size.
The file size for the Monochrome bitmap is 10KB as opposed to the 24-bitmap file size which is 228KB.
I think there is a difference in the file size because the 24-bitmap has more colours and has a nicer effect on the saved image and the Monochrome bitmap has slightly less effects and colours.
Tuesday, February 17, 2009
Paint Tools!!!

 Fill With Colour
This helps you to fill the whole area with a certain colour you might choose. If you need to fill the background colour, all you have to do is click that space with the right button on the mouse and if you need the foreground coloured you have to click the left button on the mouse.
 Using the Paint Brush
This helps you to create the effect that looks like you painted the picture with a brush. To use this you just need to click a colour and drag the mouse pointer.
 Using an Airbrush Effect
 This helps you to create an image that looks like it was spray painted. To use it all you have to do is choose a colour and drag the mouse pointer.
 Using the Eraser
This helps you to rub out the things that are not needed on your picture. To erase a section that you want you just have to drag the mouse pointer to the area you want erased.
 Using the Pencil
This allows you to draw a free form line. To use it to draw all you have to do is drag the mouse pointer and draw.
 Drawing a Curve
This helps you to draw curves . All you have to do is to draw a straight line and then click where you want your curve to be. You could also change the colour of the line.
 Drawing a Polygon
This helps you to draw different shapes. You could also colour the shape. To draw the shape you have to click and drag the mouse pointer.
 Typing
This helps you to type in words that go with your image. To use this all you have to do is drag the mouse pointer to create the text frame. Then you click inside the frame and just type. Drawing a straight line
This helps you to draw a straight line on your picture. To use it all you have to do is drag the mouse pointer to where you want.
 Drawing a circle
This helps you to draw either circles or eclipses. To use it drag the mouse pointer. To draw a perfect circle, press shift.
Subscribe to:
Comments (Atom)